Shapes
First graders are introduced to two dimensional shapes.
Students get used to using the correct name for shapes as well as imagining how those shapes move and rotate through space.
These puzzles are also an easy way to build vocabulary surrounding geometric shapes like Triangles, Square and Rectangle.
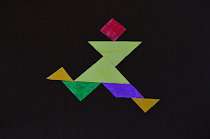
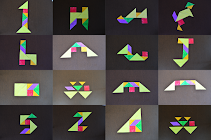
We can make all kinds of different shapes with 7 tans. Basic shapes can also be constructed with seven or fewer tans .Restrict the number of tans and ask how many shapes are possible with these tans.
Triangle
Make a triangle from two small and one medium triangles.
Make a square from two small and one medium triangles.
Make a parallelogram from two small and one medium triangles.
Make a rectangle and trapezium using two small triangles and parallelogram.
Make a square, rectangle and a triangle using all seven pieces.
Square
Constructing squares using 1, 2, 3, 4, and 7 pieces . Can we do it with 5 or 6 pieces only ?
Do analysis and find out why it is not possible.
Make other shapes like rectangle, trapezoid, parallelogram and polygons with more than 4 sides.
Transformations: Flips, Turns and Slides
Transformations are changes that are made to a shape.
Slide, Turn and Flip are position changes you can make to a shape.
These changes describe motions and the result of a motion.
Slide
I can slide this triangle to the top, bottom, diagonally, to the left or to the right.
Slides are the simplest transformation just moving something from one place to another.
No rotation, resizing or anything else, just moving.
In pre-primary grade, children learn to describe relative position using words like: above, below and between.
In primary grades, we usually describe a slide using relative position words, such as "slide to the left" or "slide down and to the right".
We will use these two triangles..
Slides are also known as translation.
In higher grades, we often use grid coordinates, so a translation by (5, 0), means to slide right 5 units. translation by (0,-5) means slide down 5 units and so on. (-5,4) means slide left 5 units and slide up 4 units.
Flip
Just like we flip the paper, shapes can also be flipped.Again let's start with two triangles.
We will place one triangle on the top of the other.I can flip the triangle on the vertical side.
This is the original position and this is the position after flipping. Flipped triangle is the reflection of the original position. We can place a mirror on this vertical side and see the reflection as well.
Same triangle can be flipped on the horizontal side like this.
Again, it's a reflection of the triangle.
Try flipping on the longer side of the triangle.
Flipping is always performed with respect to a line.
If we flip the triangle in this position with respect to the middle line, its orientation remains unchanged.
Try the same activity with square and parallogram.
You can also trace the shape on normal paper with a sketch pen.
Flip the paper and you see its image just like you flip the shape.
Turn
A turn or a rotation describes the motion of turning a shape as if it were drawn on a piece of paper, and you turned the whole piece of paper.
The usual primary-grades vocabulary is a "turn" and the usual middle-grades vocabulary is "rotation".
Rotate the triangle clockwise or anticlockwise
You can rotate it by full turn. One fourth of a turn or half turn.
Triangle in this square can be rotated counterclockwise to form another triangle.
Same triangle can be rotated counterclockwise by 45 degrees, 90 degrees and 180 degrees.
With the help of grid lines, we can rotate the shape in steps of 90 degrees.
and measure the angle as well.
90 degrees
180 degrees
270 degrees
Right now we are rotating a triangle around one corner.
Use a pen to trace various angles of rotation and build a nice design.
Terms will change with grade. With primary grades, we will take in terms of center, angle of rotation.
Instead of one triangle, I can take two and repeat the same operation.
This time I get a square from a rectangle.
After any of those transformations (turn, flip or slide), the shape still has the same size, area, angles
and line lengths.
Try these operations on other shapes and with different points around which you rotate the shape.
Use Grid as well drawn on the corrugated sheet OR plain white paper for higher grades.
Use coordinates for higher grades …..
Congruence
In geometry, two figures or objects are congruent if they have the same shape and size.
These two triangles are congruent as all corresponding angles are of the same measure so are
the sides.
We can quickly check this by overlapping two triangles.
Same is true with these large triangles as well.
How about these two squares ?
One is a regular square tan while the other is formed with the help of two small triangles.
We can place this square on the top of the square on the right and check if they are congruent.
Yes, these two squares are congruent.
In elementary geometry the word congruent is often used for angles.
Two angles are congruent if they have the same measure.
We can keep a small triangle on the top of the large one and verify.
Same is true for the other two corresponding angles as well.
Similar shapes
The two triangles on the left are congruent, while the third is similar to them. The last triangle is neither congruent nor similar to any of the others. Congruence permits alteration of some properties, such as location and orientation, but leaves others unchanged, like distances and angles. The unchanged properties are called invariants.
Two triangles are congruent if their corresponding sides are equal in length, and their corresponding
angles are equal in measure.
How about a mirror image ?
This triangle on the right is a mirror image of the one on the left ? Are they congruent ?
One way to think about triangle congruence is to imagine they are made of cardboard. They are congruent if you can slide them around, rotate them, and flip them over in various ways so they make a pile where they exactly fit over each other.
Yes. Their corresponding sides and angles are equal.
These two rectangles have matching angles equal but their matching sides are not equal and so they are not congruent. They are the same shape but not the same size.
If you have two sets of tangrams, squares and triangles and rectangles can be formed in different combinations and the concept of congruence can be tested .
But with the help of pushpin , you can rotate around any point on a triangle.
Symmetry
Symmetry can be better explored with tans made from A4 paper.
Fold this paper to make a square. Cut with scissors and discard the rectangle.
Unfold and cut square along the fold. We get two triangles.
Take one triangle and fold it again in two equal parts. The two triangles are part of the 7 tans we will build.
Let us take this large triangle and fold it just to get the midpoint on this long line.
Turn around and fold it like this.
Cut along this fold line so that we get a medium triangle. This is our third tan.
Use paper tangrams to explore more about symmetry and its notations.
When the folded part sits perfectly on top (all edges matching), then the fold line is a Line of Symmetry.
This square can be folded in different ways such that the folded part sits perfectly on top.
Square has three lines of symmetry.
This triangle has only one line of symmetry .
If I fold like this, two parts do not match.
We can take help of the mirror as well to find a line of symmetry.
When the mirror is placed on the line of symmetry, the shape looks the same.
Mirror can also be placed on the square on different lines of symmetry as well.
Lines of symmetry can be identified and different formations of tans can be tried out with students as well.
Links to the templates used in this video are available on this Google Drive link.


